You can enable targeted branding of a user's What's New or Classic Home page based on the assigned Position Group, an attribute associated with their Position Code. For example, you can have a home page designed exclusively for Sales people and another for Service technicians. Functionally, when a user logs in, the LMS will identify their position group and display a designated home page with customized HTML content. Users who are not in positions groups with special home page content will be presented with the portal default.
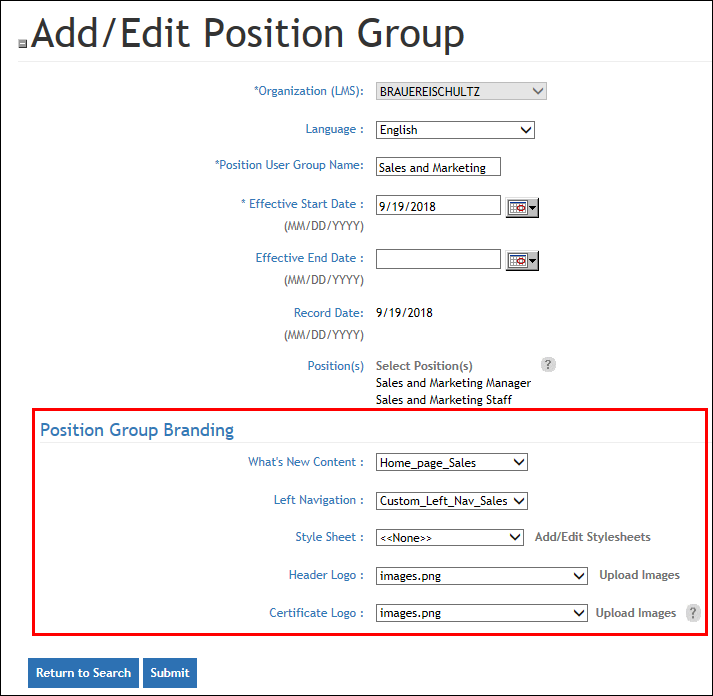
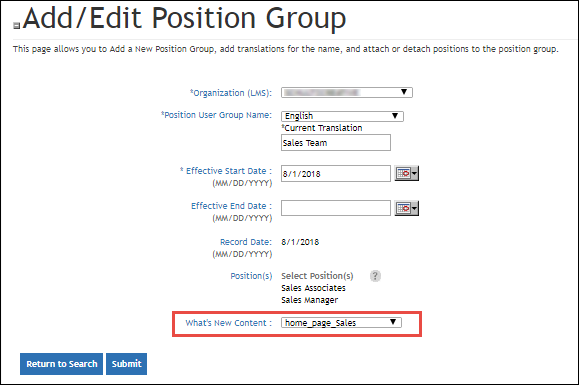
To enable this, the Add/Edit Position Group page includes a parameter to identify which page the position group will view as their home page.
Step 1: Design your custom home page for the Position Group
The page is customized in the Site Management > Edit HTML Content section where you can Add a new page or Edit an existing one. Once you have created a specific home page, you can assign it to the position group.
Step 2: Find and Edit the Position Group
- Go to the Administration Menu > Organizations > Search Position Groups.
- Search for and select the desired Position Group to access the Add/Edit Position Group page.
- For the What's New Content entry, select your position group-specific Home Page HTML file.
- Click Submit. You can now log in or impersonate a user in the targeted Position Group and check to ensure that your branding was successful.
What happens with multiple levels of branding?
Since it is also possible to also brand an organization’s home page, there must be an order of precedence when defining what home page will be shown. Home page branding follows this order of precedence:
Position Group Home Page HTML will override ->
Organization Home Page HTML will override ->
Portal language specific default Home Page HTML
This means that if you have Position group branding and Organization branding, the designated home pages that are for a specific position group will display instead of the organization branding. If you have a position group with a default home page, but you have built a branded organization page, the organization branding will show. If you have position group branding, but no organization branding, the position group branding will show. If you have no branding in either position group or organization, the system will go to the default home page HTML.
Portal administrators can customize the look and feel of their LMS by selecting any of the following tools from the left navigation menu, under Site Management.
- Edit HTML Content: Some sections of the site allow customization by updating the existing HTML code.
- Edit Stylesheets: There are several cascading stylesheets that control the coloration, features, and overall layout of your portal. You can find most styles in the stylesheet.css file.
- Edit Images: Upload images to use elsewhere in the LMS, such as HTML content and the header logo (established under LMS Information).
For basic instructions on using these features to re-design your LMS, see related document: Customize the LMS with Branded Content, Color, and Style.