Resources are curated educational materials that support the learning process. You can design resource content from many sources: documents, media files, URLs, and custom HTML pages. They can be provided to learners as stand-alone materials or can be associated with courses as either the primary content (Self-study Delivery Type) or supplemental content (eLearning, Classroom, or Assessment delivery types.)
Quick Facts
- Generally, all open file types are accepted, but the use of some may require additional corresponding software/plug-ins to render the content when accessed by a user.
- There is a file size limit of 180 MB for standard upload.
- Resources are searchable using the Administration menu or the Navigation page Resources option.
- They are not recommended for protected content.
This document provides an overview and how-to instructions on the following topics:
- Search Resources and Resource Categories
- Add Resources
- Edit Resources
- Add / Edit Resource Categories
- Link a Resource to a Course
- Provide Resources in Quick Links and Other Customizable Areas
- Restrict Resource Visibility to Authorized Users Only
Search Resources and Resource Categories
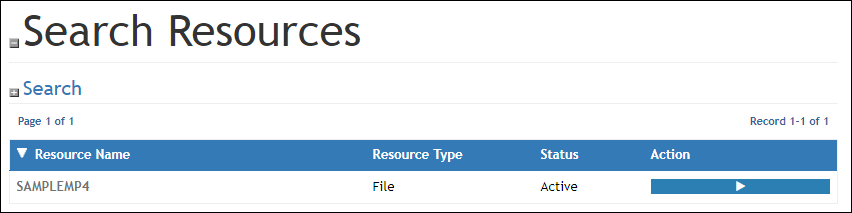
All LMS users can search available resources by clicking Resources > Search Resources from the left navigation menu of the Classic Home page or from the Navigation page Resources icon. Search results can be filtered by Keyword, Type, or Category. As with all LMS search pages, click Search using blank criteria to return a list of all active Resources. Results, as shown below, offer the option to launch the resource under the Action column (if applicable). To edit the resource, click the Resource Name link.
Users can also select Resources > Search Categories to reveal a list of resource groupings and their category descriptions, along with the search option.
Add Resources
Portal Administrators can build a resource catalog customized to their training needs by uploading content (e.g. PDFs, Word, Excel, MP4, WAV) to the LMS and/or providing links to objects such as websites, videos, and more. These educational materials can then be shared with the student community via the searchable resource library, links from specific courses, or “Quick Links” under the left navigation menu.
To create a new entry, click Resources > Add Resource from the left navigation menu. Here are the key parameters that appear on the Add Resource form. Note that asterisks (*) in the form indicate a required field. The example shows a "File" type resource addition.
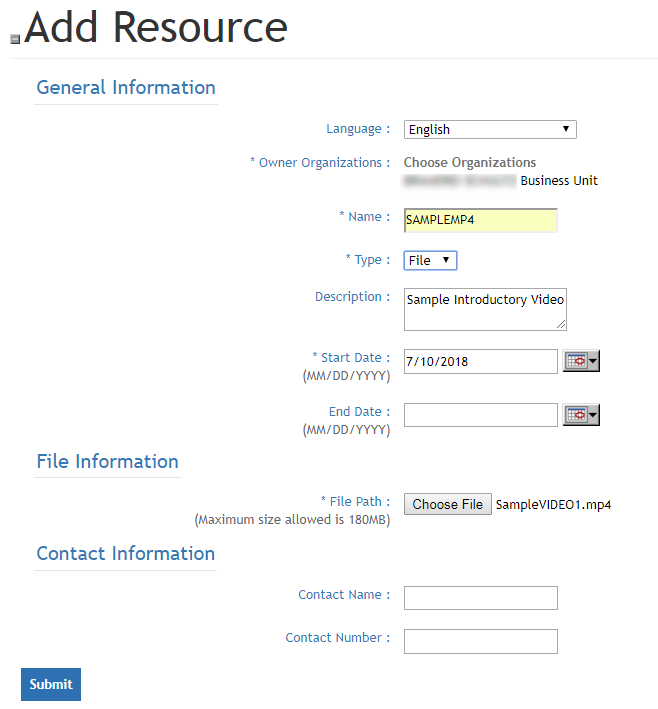
General Information
- Language: Indicate the language used in the resource (English, French, Portuguese, Spanish).
- Owner Organizations: Resource and course sharing occurs at the Business Unit level. Therefore, Resource Catalogs are available to all users affiliated with the assigned Business Units. If you plan to use Resources with courses, both must be shared with the same Business Units.
- Name: Provide a name or title that will display when the resource is listed in your resource library. Also provides keywords for search options.
- Type: Select either File, Link, or Page to best describe the type of content you will add.
--"File" can be almost any standard type, including .PDF, .XLSX, .DOCX, and .MP4, but some may require the user to have a plugin or application loaded to open the file.
--"Link" will be a URL to another web page.
--"Page" will let you select from any HTML pages you have added or modified from the Site Management > Edit HTML option.
- Description: Provide context information and additional keywords for search options.
- Start Date: Enter the date that the resource will become active and available to users.
- End Date: Entering a date before today’s date will render the resource inactive. This status will remove the record from all user views except Portal Administrators, who can still search for and edit inactive resources.
Providing Access to the Resource
Refer to the option below based on the Type selected.
- File: Click the Choose File button to upload a file (size limit is 180 MB). Note: When uploading files, please be sure that the path name of the source file is less than 255 characters; otherwise the file name will be truncated and fail to launch properly. To shorten a filename and path, save it to a folder higher in your directory structure. For instance, place it on your C:\ drive root directory, or create a C:\UPLOAD directory to which you can move the file.
- Link: Insert a fully-qualified URL.
- Page: Select your content page from the HTML Content drop-down list. These are pages you edited or created from Site Management > Edit HTML.
Contact Information
- Contact Name and Contact Number are optional fields associated with “Document and Media” resources only.
Click Submit to save the entry.
Edit Resources
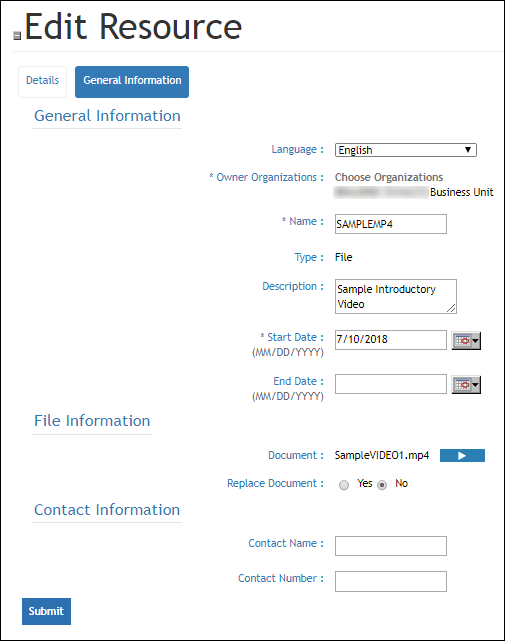
Portal Administrators can edit a resource and provide replacement content as needed. From the Administration menu, select Resources > Search Resources, conduct your search, and click on the Resource Name of the item you want to update.
The Resource Details page includes a “Details” tab, which displays read-only information, and a “General Information” tab, which allows you to edit.
For File type resources, you have the option to Replace Document by selecting Yes and uploading a new file. Links and Pages can also be updated.
Click Submit to save changes.
Resource Categories
Portal Administrators can refine their resource catalogs by creating categories in which resources are organized into logical groupings. For example, resource categories may align with Course Majors or specific user audiences (i.e. ‘New User’ Category that includes resources titled ‘LMS Help’, ‘FAQs’, and ‘Policies & Procedures’).
To create a new category, select Resources > Add Category from the Administration menu and complete the form.
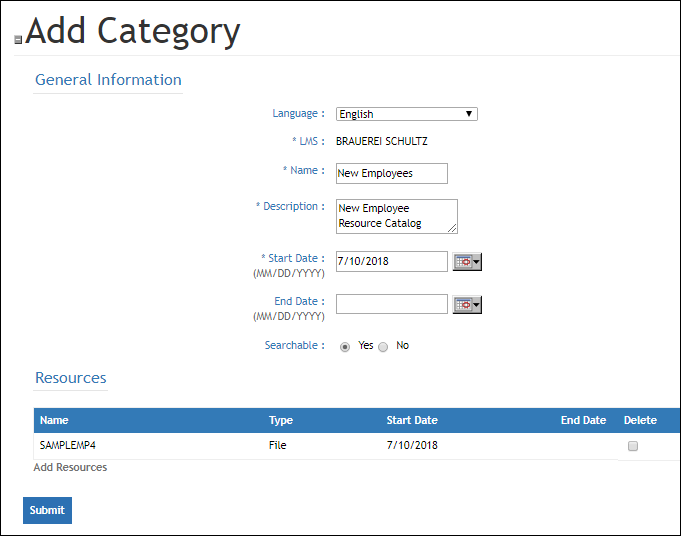
The Searchable radio button determines whether a category is searchable by all users (set to Yes) or only visible to Administrators (set to No). If you select No, the category will not show up in a Student-user search from Resources > Search Categories, but the individual resources are still searchable and visible at the resource level. Therefore, category search results may differ between Student and Portal Administrator views.
Click Add Resources to open a picker and assign existing resources to the category. Select the checkbox under the Delete column to remove a resource from the category.
Click Submit to save changes.
Link a Resource to a Course
When a Resource is designed as support material for a specific course, you can streamline the Student-user experience by associating the resource directly to a course during both the Add and Edit course processes. Once added to a course, the “Course Details” page allows credentialed users, regardless of their enrollment status in the course, to view the list of course resources that are presented as direct links to content.
Portal Administrators can make this customization during the Add Course process by clicking Choose Resource under the General Information section and using the picker to make selections. Resource assignments can be modified at any time by conducting a course search from the left navigation menu (select Courses > Search Courses), opening the Course Details page and editing the course record on the “General” tab, as shown below.
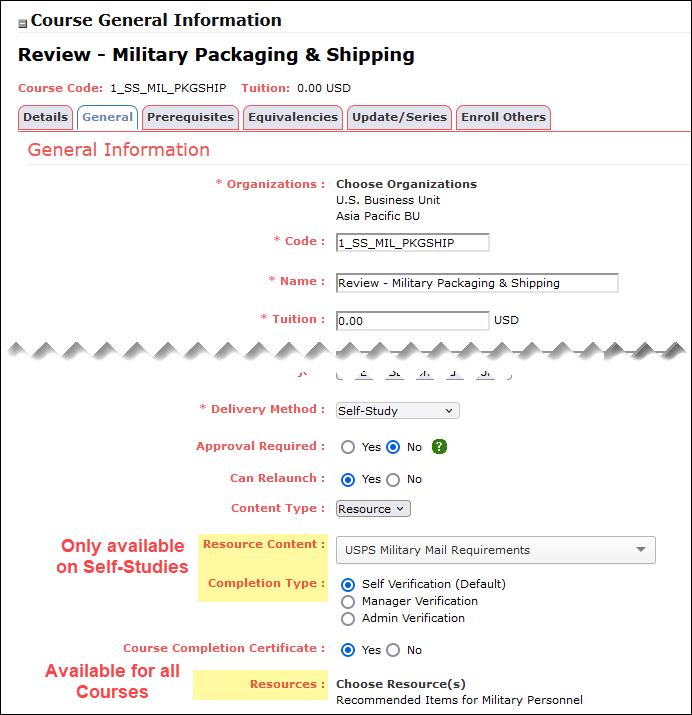
Note that the Content Type is only available when the delivery method is Self-Study and the Resource Content drop-down list is visible when Content Type = Resource. All course delivery methods allow selection of Resources using the Choose Resources option.
Provide Resources in Quick Links and Other Customizable Areas
Any resource in the catalog can be deep-linked from any of the customizable HTML areas in your LMS. These links direct credentialed users to targeted content or performance support tools, eliminating the need to conduct a search.
Each resource has a unique URL found on the Resource “Details” tab. You can copy and paste the URL into your HTML content using the hyperlink editing tool located in the left navigation menu under Site Management > Edit HTML Content.
In the example below, a “New User Guide” has been added to the Quick Links area under the left navigation menu of the Classic Home page.

Restrict Resource Visibility to Authorized Users Only
If you have a document that you want a subset of employees to review, but you don’t particularly want all of your users to be able to access, it is possible to create a “hidden” resource within the LMS.
By making a Resource inactive and then using its unique URL as Self-Study course content, you can create an approval-required Course to ensure that only targeted learners with approved enrollment can access the resource material. For more information on this topic, please click the linked instructions on how to add a restricted resource.
Please contact Support@LatitudeLearning.com with questions about creating and managing any type of resource.
|